Automatically Transcribe Audio from Google Drive into a Zapier Table
Purpose
This guide will show you how to automatically transcribe any audio file by uploading it to Google Drive in order to create a Zapier Table with the transcription.
Requirements
I. Accounts & API Keys
- Google account for Google Drive
- Zapier account for the integration
- Speech is Cheap API key
II. Google Drive Upload Folder
-
Log in to Google Drive
-
Create a new folder or choose an existing one
-
Change the access settings since the file must be publicly accessible:
- Right-click on the folder, then click on Share ⯈ Share
- Under "General access," change from "Restricted" to "Anyone with the link"
- "Viewer" permissions are sufficient
III. Zapier Table Template
In order to store the transcription in separate Zapier Table, you must first create a Zapier Table template.
-
Log in to Zapier and go to Zapier home
-
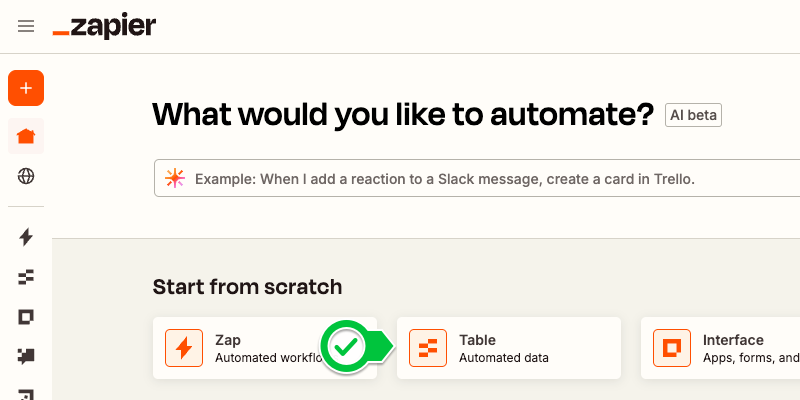
Click on "Table" under "Start from Scratch"
-
Create a blank table called "Transcription Template"
-
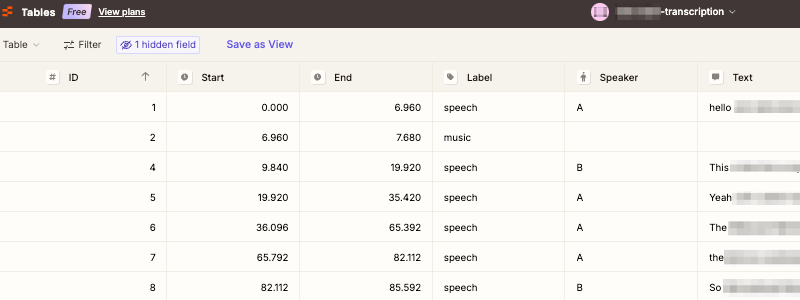
Configure the columns:
Name Type Alignment Icon Decimals ID Number Right hashtag 00 Start Number Right clock 0.000 End Number Right clock 0.000 Label Text Left tag Speaker Text Left person Text Text Left message -
Sort the table by ID ascending (↑)

Implementation
Transcribe Audio
-
Go to Zapier home
-
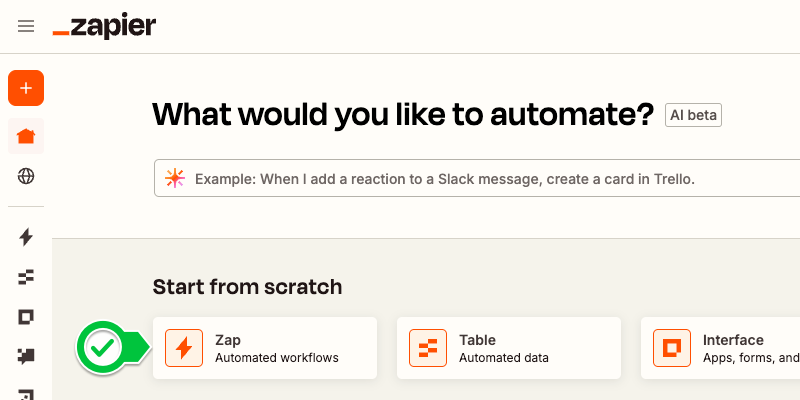
Click on "Zap" under "Start from Scratch"
-
Click on Trigger and pick the Google Drive app
-
Trigger Setup
- Trigger event: New File in Folder
- Account: Your Google Drive account
- Click on "Continue"
-
Trigger Configuration
- Drive: Your Google Drive
- Folder: The folder you want to upload audio files to
- Include Deleted Files?: Only return non-deleted files (recommended)
- Click on "Continue"
-
Trigger Test
- Click on "Test Trigger"
- Click on "continue with selected record"
- Note: this step requires having at least one file in that folder
-
Action Setup
- App: Speech is Cheap (or use this link to find it)
- Action event: Transcribe Audio
- Click on "Continue"
-
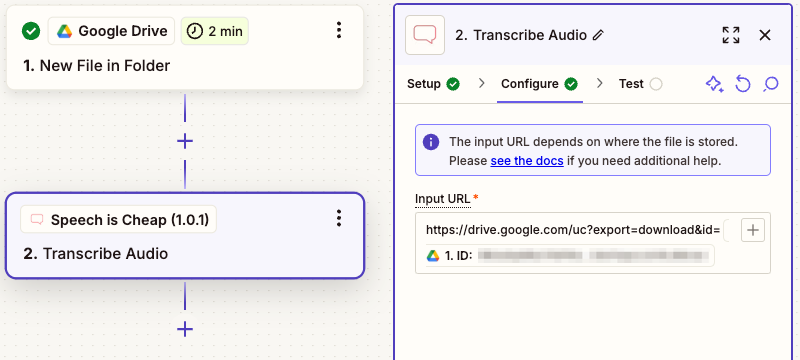
Action Configuration
- Input URL:
- Type
https://drive.google.com/uc?export=download&id= - Click on the plus (
[+]) - Select
IDfrom Google Drive
- Type
- Fill out the remaining optional fields
- Click on "Continue"
- Input URL:
-
Action Test
- Click on "Test step"
- Note: "Data out" will contain a sample transcription
- Click on "Test step"
Populate the Zapier Table
-
Add a step by clicking on the plus below the "Transcribe Audio" action
- Choose "Tables"
- Action event: Duplicate Table
- Click on "Continue"
-
Action Configuration
- Table ID: "[Table] Transcription Template"
- Name:
- Click on the plus (
[+]) - Select
Titlefrom Google Drive - Type
-transcription
- Click on the plus (
- Description: (optional)
-
Add a step by clicking on the plus below the "Duplicate Table" action
- Choose "Looping"
- Action event: "Create Loop From Line Items"
- Click on "Continue"
-
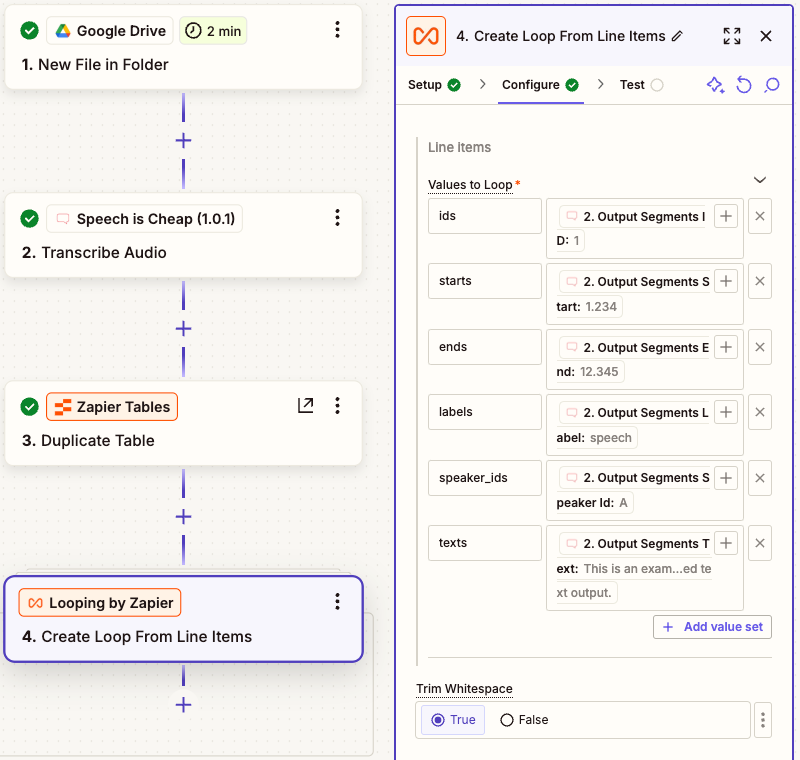
Action Configuration
- Under "Values to Loop," click "Add value set" five times to loop on six values
- Fill out the following values:
- Type
ids, click on the plus, search for "Output Segments ID" - Type
starts, click on the plus, search for "Output Segments Start" - Type
ends, click on the plus, search for "Output Segments End" - Type
labels, click on the plus, search for "Output Segments Label" - Type
speaker_ids, click on the plus, search for "Output Segments Speaker Id" - Type
texts, click on the plus, search for "Output Segments Text"
- Type
- Click on "Continue"
- Click on "Test step"
-
Add a step by clicking on the plus inside the loop
- Choose "Tables"
- Action event: "Create Record"
- Click on "Continue"
-
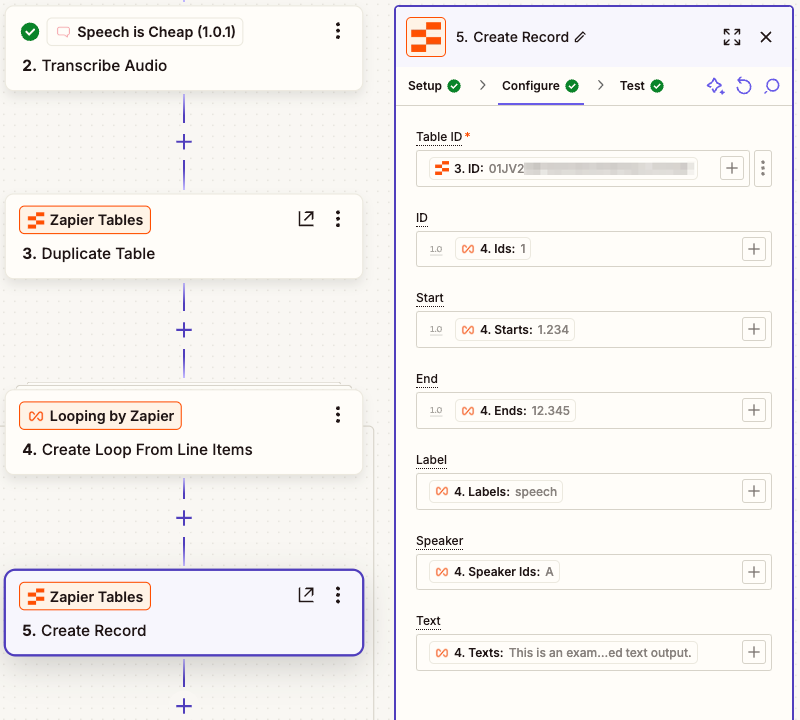
Action Configuration
- Click on the vertical ellipsis (
⋮) to the right of the "Table ID" field - Click on "Custom"
- Click on the "Duplicate Table in Zapier Tables" step
- Click on "ID"
- Add the record values:
- ID: Ids
- Start: Starts
- End: Ends
- Label: Labels
- Speaker: Speaker Ids
- Text: Texts
- Click on "Continue"
- Click on "Test step"
- Click on "Publish"
- Click on the vertical ellipsis (
Verify the Implementation
- Upload an audio file to the Google Drive folder that's watched by Zapier
- Wait about a minute, though it make take up to 15 minutes depending on the file's duration
- Look for the newly created table in your Zapier Tables